Category Archives: Dessert

The Proof Is In the Rice: Brown Rice Crispy Treats

Virtuous desserts are in high demand these days, folks. Sugar, increasingly portrayed as the satanic bearer of everything that ails us, from premature aging to cancer, is on the outs while an intriguing variety of alternative (read: “hip”) sweeteners have descended upon your organic food aisle. This does not mean that we will collectively shun the sweet stuff, the one taste that humans are born craving, oh no, how could we deny an evolutionary impulse so strong that it has the power to cause even the most devout kale crunchers to polish off a pint of Ben & Jerry’s in one go? Rather than deny an evolutionary impulse, suffice to say I’m more than willing to try a few alternatives.
Continue reading

Change-Your-Life Raw Brownies


Sugar is my Achilles’ heel. Always has been, and at the risk of sounding indolent, probably always will be. Nevermind that fact that I can pound wheatgrass shots and veggie juices with the best of ’em, I just can’t seem to shake this particular monkey off my back. I can’t ever have just one serving/slice/square/bite of anything containing some incarnation of sweetness, oh no, I have to have several Everest-sized servings. I am always on the lookout for a dessert recipe that will minimize the damage I do when I go on one of my infamous sugar benders. I adore any sweet treat with fruit, nuts, whole grain flours, honey… you get the idea. My distorted junkie logic assures me that this is license to go for the gold and have those two extra helpings.

When I saw this recipe for raw, vegan brownies, brownies that merely contained dates, walnuts, almonds, and raw cacoa, my eyes did a little bit of bugging. “Could this be the recipe that finally saves me from my self-destructive sugar addiction?” I wondered. And so off I motored to Whole Foods as fast as my sugar hangover from the previous night’s festivities would allow, miniscule grocery list in hand, in search of raw cacao powder and a boatload of Medjool dates. FOUND.
Continue reading

How to Have Your Cookies and Eat Them, Too: Teff Peanut Butter Cookies

“New year, new you” blah blah blah. Amongst my circle, cutting down on white sugar is by far the most unanimous resolution. However, if you’re like me, there is no way in hell that you’re cutting out sweets. Not only do I advise against cutting out sweets for countless emotional and psychological reasons, but also for physical ones. They say withdrawal is a terrible thing… so WHY go cold turkey when you can whip up a batch of these delightful little bundles of joy? Made with teff flour, a veritable nutritional powerhouse from Ethiopia full of fiber, protein and iron and sweetened with maple syrup, these cookies are rather righteous. Oh, and they’re vegan to boot.
Continue reading

Dark Chocolate Chunk Pumpkin Bread

Consider how admirably convenient this combination of ingredients is – pumpkin, chocolate, and a plethora of intoxicating fall spices. Depending on your dining habits, this can work well for both breakfast and desert. Rather, consider this a convenience food of sorts.

Dark Chocolate Chunk Pumpkin Bread
Makes 2 loaves

3 1/4 cups unbleached all-purpose flour OR whole-wheat pastry flour
2 teaspoons cinnamon
1/2 teaspoon freshly grated nutmeg
1/2 teaspoon allspice
1/2 teaspoon ground ginger
2 teaspoons baking soda
2 teaspoons fine-grain sea salt
one 15 oz can pumpkin puree
1 cup safflower oil
3 cups raw cane sugar
4 eggs
1 teaspoons pure vanilla extract
three 3 oz bars dark chocolate, chopped

1.) Preheat oven to 350 degrees. Grease two 9×5″ loaf pans. In a medium-sized bowl, whisk together the first seven ingredients, from the flour through the salt.

2.) In a separate large bowl, whisk together the pumpkin, oil, and sugar. Beat eggs, one at a time, into pumpkin mixture, and then the stir in the vanilla. Add 3/4 cup tepid water to pumpkin as well as the chocolate chunks. Stir to combine.

3.) Add dry ingredients to the wet and stir until just combined. Pour evenly into the two prepared pans and bake on the middle rack of the oven for 1 hour 15 minutes to 1 hour 40 minutes; until golden. Cool in the pan for 15 minutes and then turn out onto a cooling rack to cool completely.

“Samoa” Tart

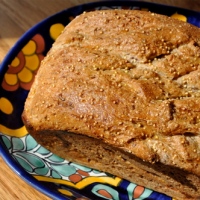
Samoa. Yes, SAMOA, everyone’s favorite Girl Scout cookie. The box that disappeared waaaay before the thin mints were even opened. To counteract the naughtiness, the crust is whole wheat pastry flour (a bit o’ fiber here, a bit o’ fiber there.) Chocolate, caramel, and coconut – oh yes!

It can be eaten soon after cooling, or may even be better after being refrigerated overnight, as the goopiness sets to create a more cohesive tart experience.

“Samoa” Tart

Dough
1 cup whole wheat pastry flour

1 generous tablespoon natural cane sugar

heaping 1/4 teaspoon fine-grain sea salt

1/2 cup cold unsalted butter, cut into ¼” cubes

1-4 tablespoons ice water

3/4 teaspoon vanilla extract

Filling
1 cup heavy cream
1 cup natural cane sugar

1/8 teaspoon salt

1 cup unsweetened shredded coconut, lightly toasted in the oven

1 teaspoon vanilla extract

Topping
1/4 cup cacao nibs

one 4 oz. bar good-quality dark chocolate, finely chopped

1.) To make the crust, whisk together the flour, sugar, and salt in a large bow. Add the cubed butter and use a pastry cutter, fork, or even your fingers to break up the butter into small pieces the size of peas. Add the vanilla and water, as needed, until the dough just barely comes together. It will be very dry. Press into a disk, wrap in plastic, and chill thoroughly; at least an hour. Remove and allow the dough to come back to room temperature.

2.) Grease bottom of a 9-10 inch tart pan and then line the bottom with parchment paper. Unwrap dough and, using the palms of your hands and whole lot of elbow grease, press and press and PRESS that dough out as thinly as your can, around the bottom of the pan, and up its hilly sides with your fingers. If you press a hole into the dough, not to worry, just patch it up with a bit of the overhang. Place in the freezer and chill thoroughly; at least an hour.

3.) Preheat oven to 375 degrees. Remove crust from freezer and bake for 20-30 minutes; until lightly browned. While crust is baking, make the filling.

4.) Heat the cream, sugar, and salt in a heavy sauce pan over medium-high heat until it begins to boil. When it begins to foam and rise up, remove from heat, and stir in the coconut and vanilla. Scrape filling into the prepared crust.

5.) Bake for 10 minutes, then use a heat-proof spatula or the like to lightly tap all around the surface to break up any caramelization/setting that is occurring. This helps the tart to bake evenly and prevents it from wrinkling up. Bake for another 10 minutes, tap again, and then bake for a final 10 minutes or so for a total baking time of about 30 minutes.

6.) Remove from the oven, place on a cooling rack, and immediately sprinkle those lovely little nibs all around the tart’s surface. Wait a minute or so, and then sprinkle the chopped up chocolate bar across the tart. When completely cooled, remove the tart ring gently. Don’t even think about whipped cream.

The Quest for the Perfect Chocolate Chip Cookie Part II: Kim Boyce’s Whole Wheat Chocolate Chippers

“Whole wheat chocolate chip cookies?” you may ask, and surely gasp in chocolate-chip-cookie-purist horror, “Surely not!” But it’s true! I’ve tested these on numerous unsuspecting friends, family, and coworkers and no one made a peep about the wheaty, hippie-mamma nature of these cookies. Upon disclosure of the secret I received blank stares, looks that soon caused them to slow their rabid chewing look, look at the ceiling, squint their eyes in intense focus, and then – “Nope, can’t taste anything wheaty. That’s so weird!”

Given my recent proclivity towards natural cooking and baking, some weren’t at all surprised at the test-subject nature of the prank. I highly recommend baking these and not divulging the secret until you’ve received lustful words of thanks. These cookies are as delicious as nectar is to a BEE. The whole wheat simply gives the cookies a firmer, more substantial crumb (i.e. these are not wimpy, Chips-Ahoy cookies) and the massive chunks of bittersweet chocolate, as my sister said, “take them to a whole other level!”

I know I’ve become a bit repetitive with my endless adoration of Good to the Grain (yeah, I know, I’ve jumped on the bandwagon) but isn’t that an indication that it is, indeed, time to add it to your cookbook library if you haven’t already?

Whole-Wheat Chocolate Chip Cookies

8 oz (2 sticks) cold unsalted butter, cut into 1/2″ chunks
1 cup dark brown sugar
1 cup sugar
2 eggs
2 teaspoons vanilla extract
3 cups whole-wheat flour
1 1/2 teaspoons baking powder
1 teaspoon baking soda
1 1/2 teaspoons kosher salt
8 oz high-quality bittersweet chocolate, roughly chopped to the size of your liking!

1.) Place one rack in the upper third of the oven and the other in the bottom third. Preheat oven to 350 degrees. Line two heavy baking sheets with parchment paper.

2.) In a large bowl, beat butter and sugars with an electric mixer until blended; 2 minutes or so. Add eggs one at a time and beat after each addition. Use your spatula to scrape down the sides of the bowl throughout. Mix in vanilla.

3.) Sift flour, baking powder, baking soda, and salt directly into the bowl with the wet ingredients. Blend until just combined. Add chocolate and use your hands to evenly disperse.

4.) Using an ice cream scoop spoon little mountains of dough, approximately 3 tablespoons in size, onto the baking sheets. Leave a few inches between each mountain. Bake for 15-20 minutes, swapping the top tray with the bottom tray halfway through. The cookies are done when they are lightly browned and the edges are beginning to set. The cookies will still be very, very soft and gooey when they’re done, and you will have to be careful when moving to a cooling rack. It is essential to not overbake these – resist the temptation to bake them longer than 20 minutes.

This recipe was very slightly adapted from Good to the Grain by Kim Boyce. Published by Stewart, Tabori, & Chang, New York; 2010.

The Quest for the Perfect Chocolate Chip Cookie Part I: America’s Test Kitchen Recipe


Oh my. There are as many “best” chocolate chip cookie recipes in the world as there are cooks. After some serious scouring of the foodie community’s blogs, I deduced that America’s Test Kitchen’s “Perfect Chocolate Chip Cookies” would be my best bet.

For those of you that aren’t familiar with this recipe already (apparently I was one of the few who wasn’t), it systematically dissects, and improves upon, the classic Nestle Toll House recipe. You know the one – on the package of every heavenly bag of chocolate morsels you’ve bought since you were a kid.

A classic recipe, a nearly perfect recipe… but this is the perfect recipe. Chocolate chip cookie afficiandos will appreciate the step-by-step breakdown of the improvements America’s Test Kitchen made to the original Toll House Recipe. Perhaps you will even keep these tips at the back of your mind for a variety of recipes.

1.) Bake your cookies one tray at a time in the very center of your oven. This gives you a perfect, evenly textured cookie. Even if you rotate the two trays throughout baking, one tray inevitably ends up browner, softer, etc. than the other one.

2.) Use more brown sugar than white. Using equal amounts brown and white sugar, as in the Toll House recipe, leads to a cookie lacking in the oh-so-sought-after blissfully chewy texture. Using more brown sugar gives you this.

3.) Use melted, browned butter. Is there anything more divine than browned butter? It enhances the flavor of nearly everything you use it with due to its intoxicating nutty flavor. Browned butter also enhances the chewiness of the cookie, whereas plain ol’ creamed butter leads to a cakier-textured cookie.

4.) Use more egg yolks than egg whites. It further contributes to the chewy bliss of your cookie.

5.) Make bigger cookies. Oh yes, don’t you love this step? By simply rolling larger dough balls (which we all secretly want to do anyway), you will instantly create a heavenly variety of textures within a single cookie. The outside will be quite crispy, and will become increasingly chewier until you reach the center of the cookie. The center will be the epitome of chewy perfection.

6.) “Whisk and Wait.” This is the most time-consuming alteration to the Toll House recipe. It’s very “technical” (well as technical as you can get with a chocolate chip cookie recipe), and rests on the notion that by gradually beating the sugar into the liquid ingredients, you are allowing for the sugar to dissolve more evenly. It goes like this: you whisk the eggs into the sugar, let ingredients rest for 3 minutes, beat for 30 seconds more, let the ingredients rest for 3 minutes, beat for 30 seconds, let rest for 3 minutes, and then beat one final time for 30 seconds. WHEW! Oh, but it’s so worth it. Gives your muscles a workout, too. Maybe you won’t feel as guilty eating a dozen of them in one night after expelling such a great amount of elbow grease. Maybe?

7.) Sprinkle a little sea salt on top. This is actually taken from the New York Times chocolate chip cookie recipe, and sounded so lovely that I just had to add it to my ATC batch. The NYT recipe is, for sure, the next chocolate chip cookie recipe on my list!

These are the salted guys!


The full cookie recipe can be found over with the lovely folks at Cook’s Illustrated:
America’s Test Kitchen Perfect Chocolate Chip Cookies Recipe